casaoscloudflareollamagoggle imagecloudflare zero trusthomeserver
Make Your Home Server (CasaOS, Immich, Jellyfin, Ollama) Accessible Online with Cloudflare Zero Trust
Bishwo Dahal
September 2, 2025
5 min read
Learn how to host CasaOS, Immich, Jellyfin & Ollama online securely using Cloudflare Zero Trust and Warp.
CasaOS Setup
Please go to Cloudflare setup step if you already have
CasaOSsetup. You can follow this link.
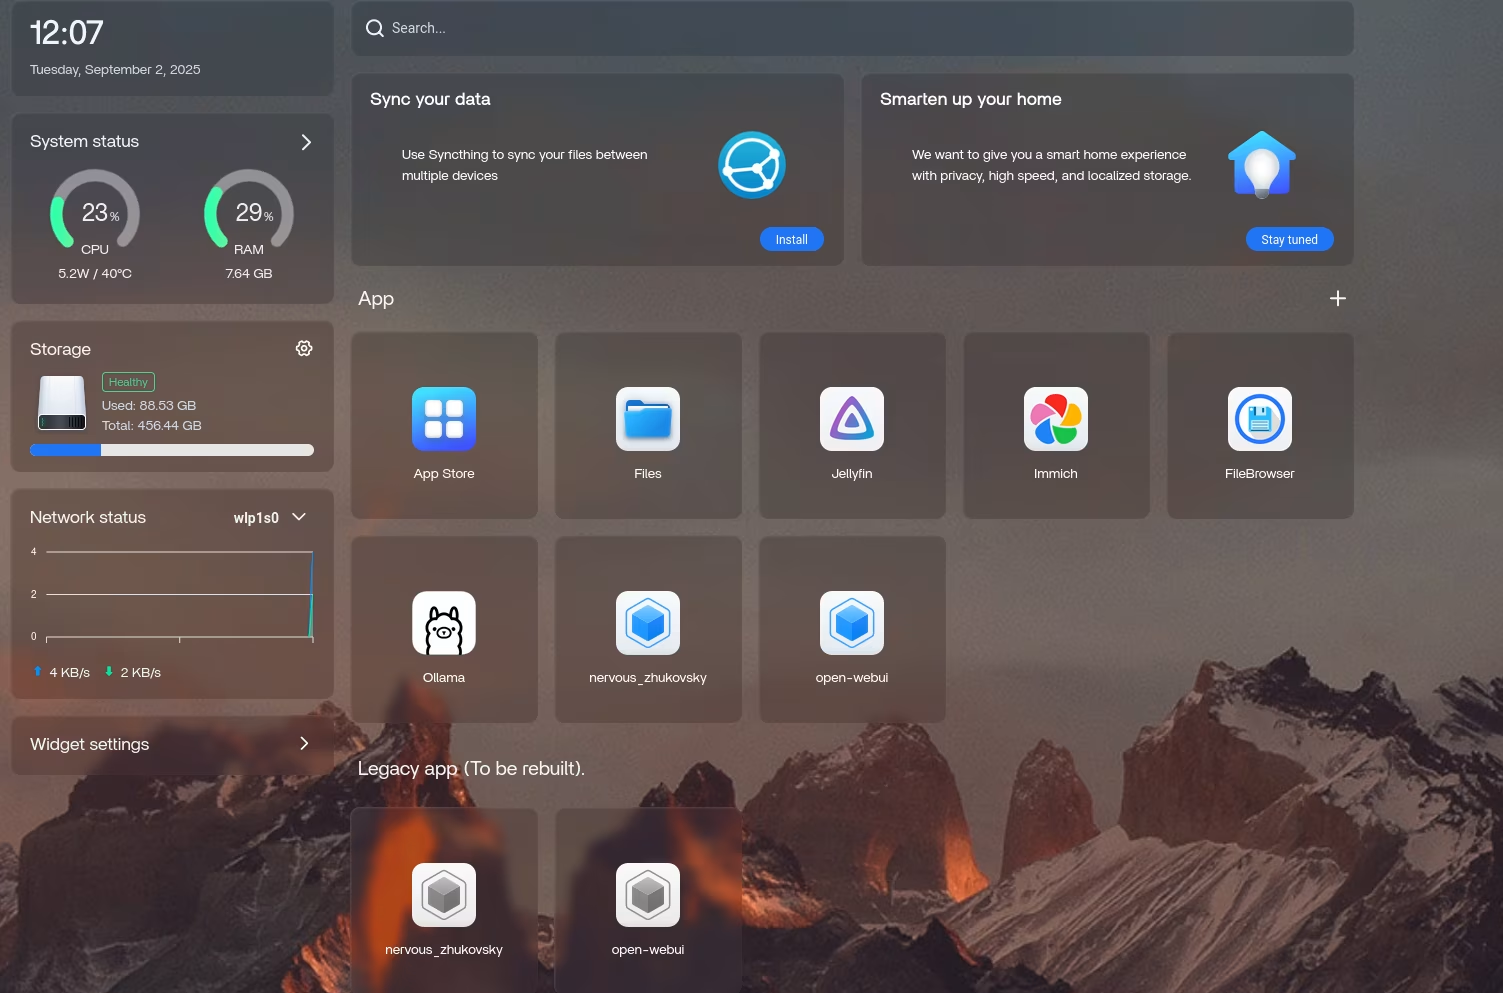
CasaOS is Community-based open source software focused on delivering simple personal cloud experience around Docker ecosystem. Learn more at CasaOS official website.
Start setting up docker and CasaOS
- Install docker on your linux machine! If you don't have linux machine setup, I would recommend to install
debianserver os. - Install CasaOS
curl -fsSL https://get.casaos.io | bash - Access your application by going to
http://yourlocalhost:81on any machine that are connected to the same network. - You could find your local host either by going inside router management or using
hostname -Icommand. - You will see something like
Look for something like10.0.0.999 172.98.0.1 172.99.0.1 172.99.0.1 ffff:3c33:fff:f0ff:f0ff:ff:fe9a:9fcf192.168.x.xor10.x.x.x— that’s your local IP. In this case,10.0.0.999is your ip.
Cloudflare setup
Cloudflare Domain name
- Click on to domain name that you would want to host your home server at.
- On the left panel, You will find
Accesstab, where you should click, Launch Zero Trust.(This will launch Zero trust home page)
Creating tunnels
- Under
Networkstag, click on Tunnels. We will be usingcloudflaredversion of Tunnel which is recommended way of running tunnel. - Copy the commands and add
-dafterdocker run. Your full command will look something like this:docker run -d cloudflare/cloudflared:latest tunnel --no-autoupdate run --token putYourLongTokenInPlaceOfThisText - Running this command will create run cloudflared as daemon.
- Under
Public Hostnametab, Create a new public hostname. 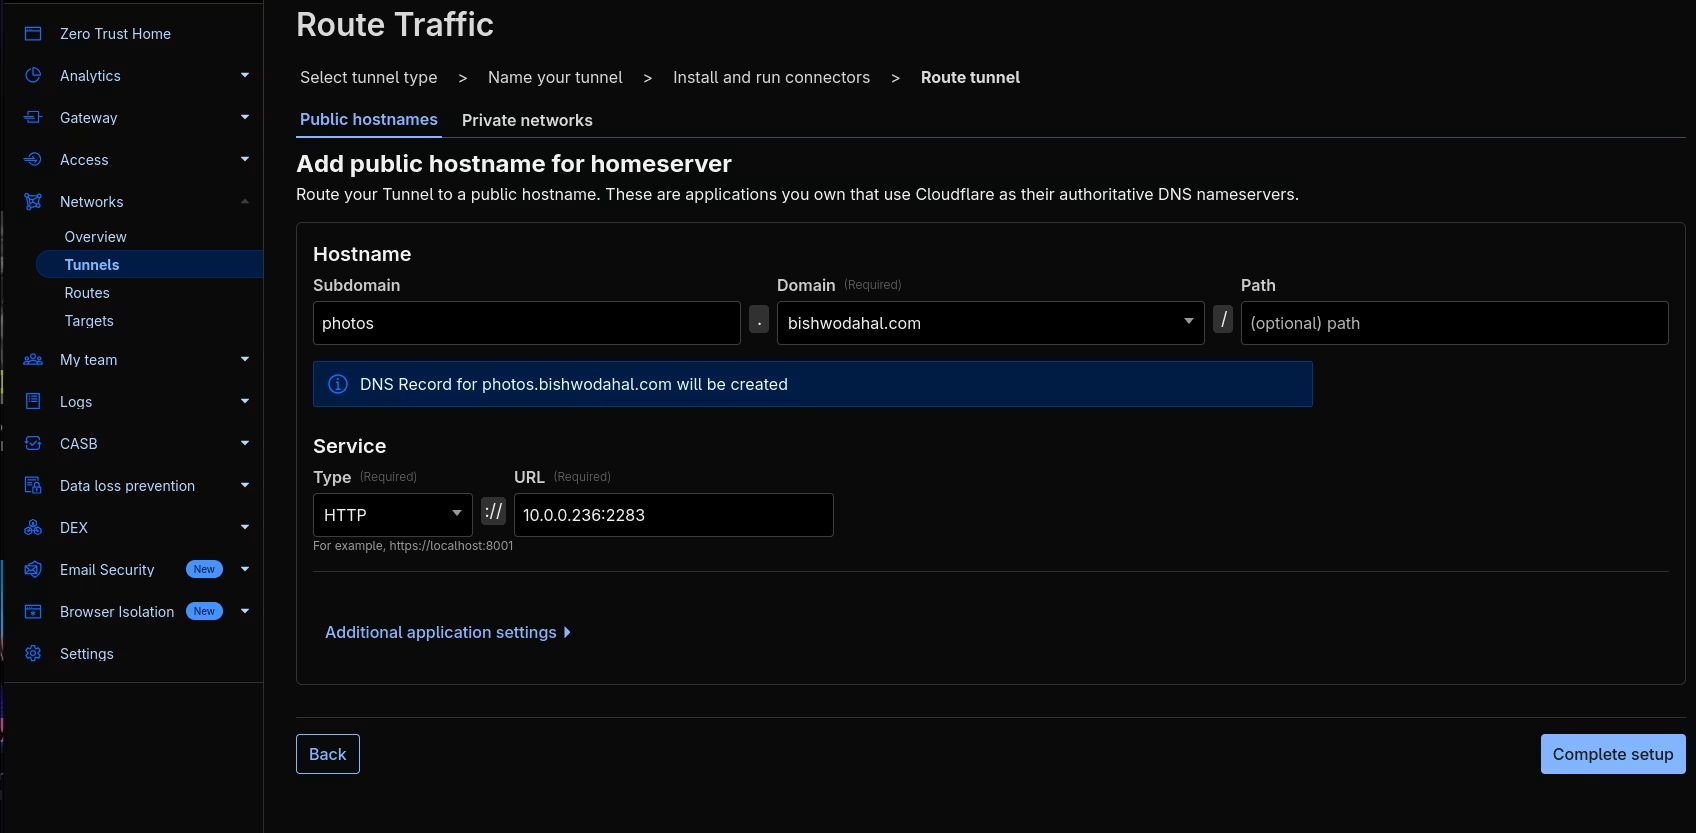
- Add public hostnames for each application that you want exposed! You can even expose
CasaOS port 81, but I am not exposing it here. (Not recommended if you don't follow Zero-trust tutorial!)
Creating an application inside zero trust
- Under
Accesstab, you will findApplications. On clicking Applications, you would be shown a menu where you would choose type of application that you are creating. - We will select
Self Hostedoption which - See image for reference, on what we can add here
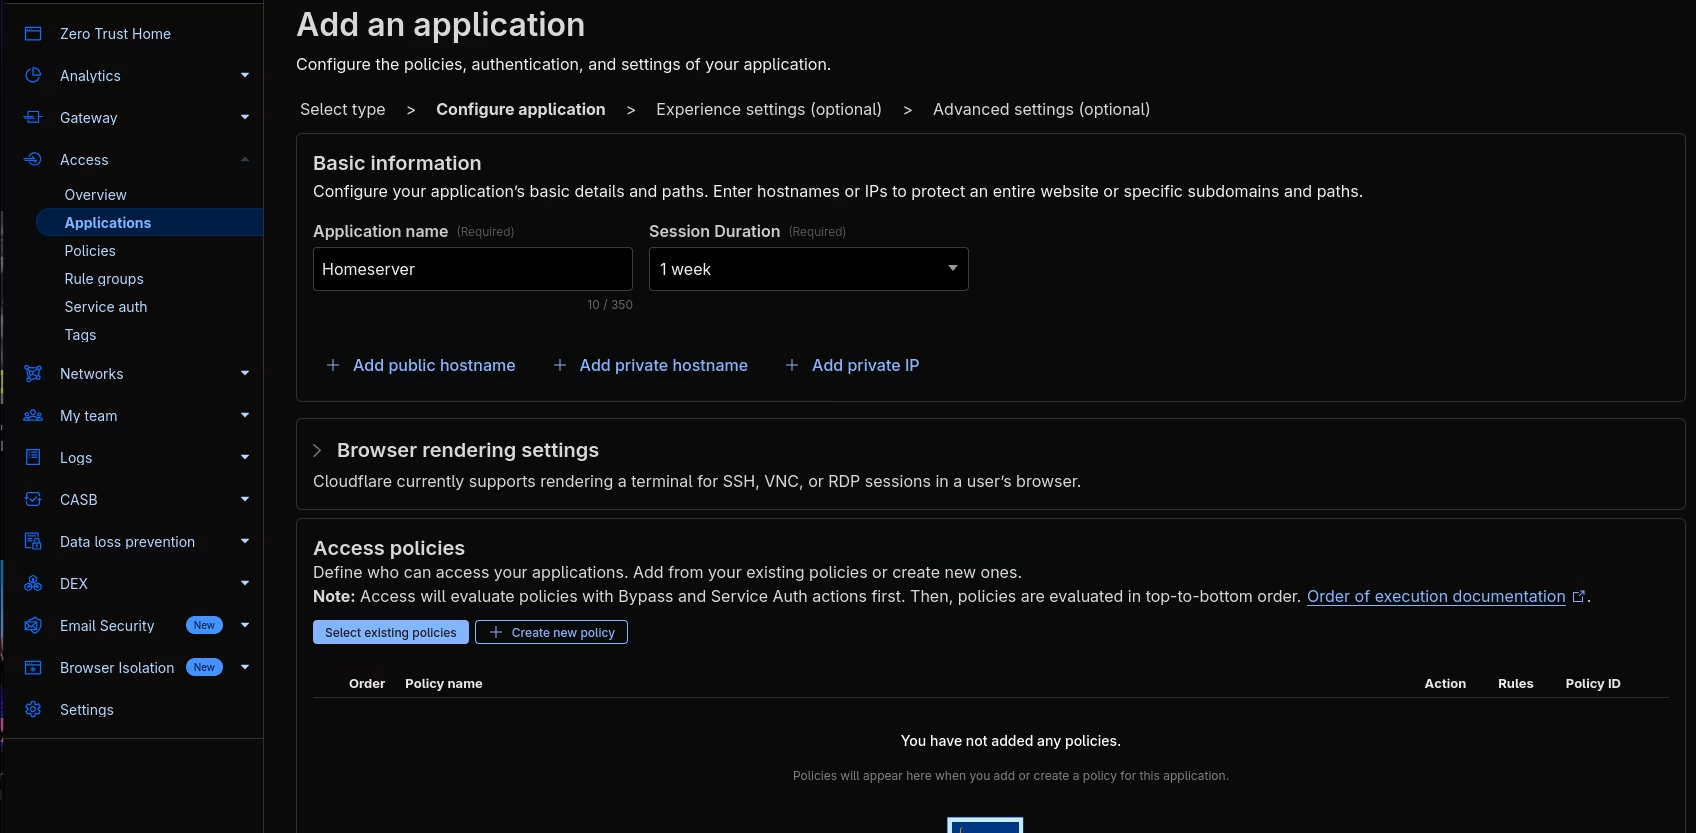
- Finish this step by changing any additional configuration you would want to edit!
Securing our application
- Under
Accesstab, you will findPolicies. Create a policy by clickingAdd a policy. Enter any number of emails you want to use that will have access to your application. 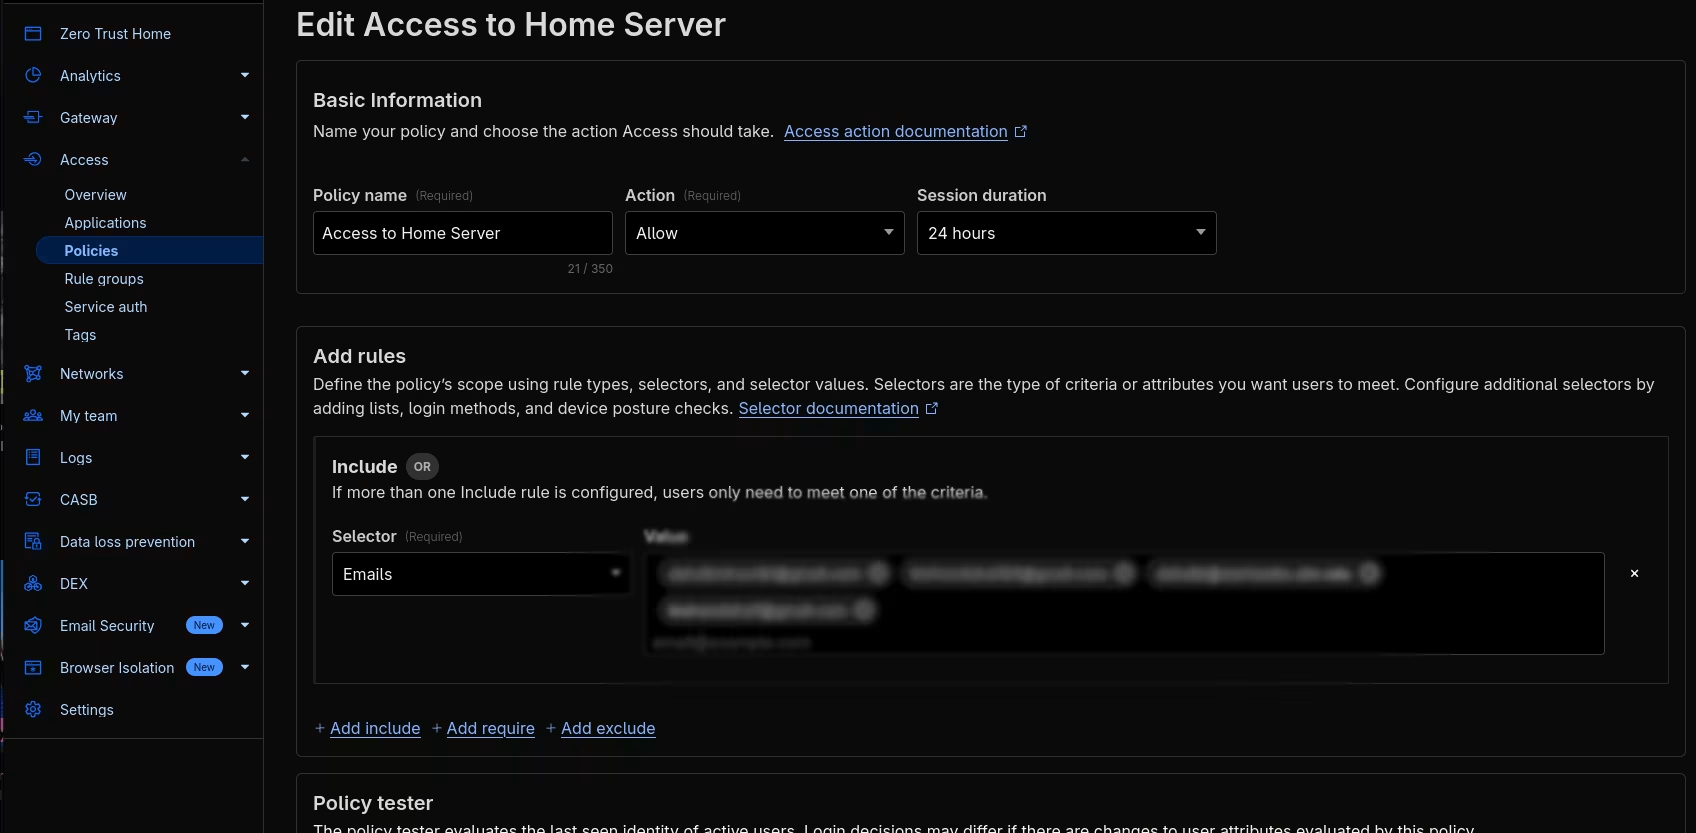
- Under
Applicationtab from previous step, click go underPoliciesand clickSelect existing policies - Select policies that you want to apply! In this case, "Allow to Home Server"
Your Homeserver is live on internet!
Congratulations 🎉 — you’ve successfully set up your self-hosted environment and exposed it securely with Cloudflare Zero Trust. But this is just the beginning. Now that your homeserver is publicly accessible, you can start hosting other powerful applications.
Here are some ideas to get you started:
- Ollama (AI at Home)
Run large language models directly on your server and access them anywhere. This package is directly available in CasaOS application. You might need to download it manually if you have GPUs other than NVIDIA. Follow docker ollama installation guide. - Immich (Google Photos Alternative)
Host your personal photo library with facial recognition and smart search features like text, person, places, and maps. - Jellyfin (Your Personal Netflix)
Stream legally available movies, TV shows, and music from your home server to any device, just like Netflix, but open source and private. - Private Cloud Backup Use your server as a secure backup destination for files, documents using filebrowser application.
Share this article:
Back to Blog